
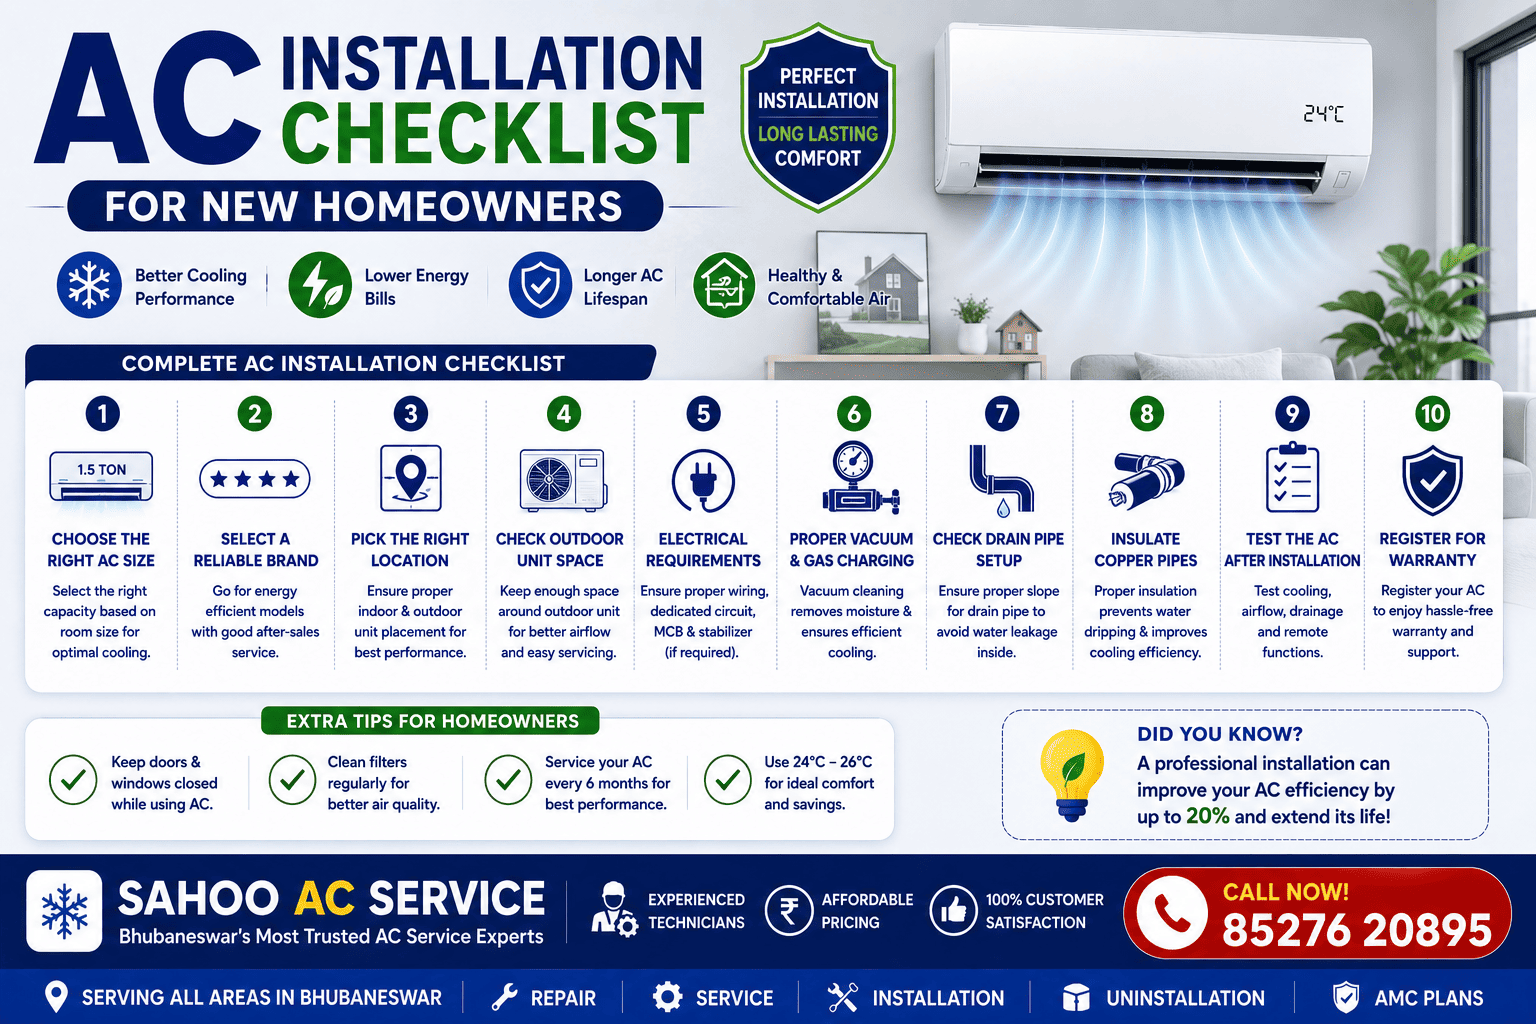
Moving into a new home is exciting. From selecting furniture and appliances to planning interiors, homeowners spend a lot of time creating a comfortable living space. One important decision that often gets overlooked is proper air conditioner installation.
Many people focus only on buying the right AC but pay very little attention to how and where it will be installed. Unfortunately, even the best air conditioner can perform poorly if installation is not done correctly.
Improper installation can lead to:
- Poor cooling performance
- Higher electricity bills
- Water leakage issues
- Frequent breakdowns
- Reduced AC lifespan
That’s why new homeowners should follow a proper installation checklist before installing an air conditioner.
This guide covers everything you should verify before, during, and after installation to ensure long-term cooling performance.
Before You Buy an AC: Ask These Questions First
Most installation problems actually start before the AC is purchased.
Before selecting an air conditioner, consider the following factors.
Is the AC Capacity Suitable for Your Room?
One of the biggest mistakes homeowners make is choosing the wrong tonnage.
If the AC Is Too Small
- Cooling becomes slow
- Compressor works continuously
- Electricity bills increase
If the AC Is Too Large
- Frequent ON/OFF cycling
- Poor humidity control
- Higher purchase cost
As a general guideline:
| Room Size | Recommended Capacity |
|---|---|
| Up to 120 sq ft | 1 Ton |
| 120–180 sq ft | 1.5 Ton |
| 180–250 sq ft | 2 Ton |
Selecting the correct capacity is the first step toward efficient cooling.
Is the Room Receiving Direct Sunlight?
Rooms facing direct sunlight usually require more cooling.
Consider:
- Large windows
- Top-floor rooms
- South-facing walls
- Poor insulation
These factors influence AC performance and capacity requirements.
Location Matters: Choosing the Right Indoor Unit Position
The location of the indoor unit has a major impact on cooling efficiency.
Ideal Indoor Unit Placement
The indoor unit should:
✔ Be mounted at an appropriate height
✔ Distribute air evenly across the room
✔ Remain away from direct sunlight
✔ Have sufficient wall support
✔ Allow unrestricted airflow
Avoid These Common Placement Mistakes
Do not install the indoor unit:
✘ Directly above televisions
✘ Near cooking areas
✘ Behind curtains
✘ Above wardrobes blocking airflow
✘ Near heat-producing appliances
Proper airflow is essential for efficient cooling.
Outdoor Unit Checklist
Many homeowners pay little attention to the outdoor unit, even though it contains critical components.
Verify the Following
✔ Adequate ventilation
✔ Strong mounting support
✔ Easy maintenance access
✔ Protection from standing water
✔ Proper drainage arrangement
Restricted airflow around the outdoor unit can reduce cooling performance significantly.
Electrical Checklist Before Installation
Air conditioners require stable electrical connections.
Before installation, ensure:
Dedicated Power Supply
A separate electrical line is recommended.
Proper Earthing
Correct earthing improves safety and protects electronic components.
Suitable MCB
The electrical circuit should support the AC’s power requirements.
Voltage Stability
If voltage fluctuations are common in your area, consider using a stabilizer.
Electrical preparation is often ignored but plays a crucial role in long-term reliability.
Copper Pipe and Drain Pipe Inspection
Many cooling issues originate from poor pipe installation.
Copper Pipe Checklist
✔ Proper insulation
✔ Correct pipe length
✔ No visible damage
✔ Leak-free connections
Drain Pipe Checklist
✔ Proper slope
✔ Unobstructed water flow
✔ Secure connections
✔ Leakage-free installation
Improper drainage can lead to water leakage problems later.
During Installation: What Should Homeowners Observe?
Most homeowners leave everything to technicians.
However, observing the process can help identify mistakes early.
Check Indoor Unit Alignment
The indoor unit should be perfectly level.
Incorrect alignment can cause drainage issues.
Ensure Proper Wall Mounting
Weak wall brackets may cause vibration and noise.
Verify Copper Pipe Insulation
Exposed pipes reduce efficiency and cause condensation.
Confirm Vacuuming Process
Professional technicians should vacuum the refrigerant line before operation.
This removes moisture and improves system performance.
Many installers skip this step to save time.
After Installation: Important Testing Checklist
Once installation is complete, don’t rush to sign off immediately.
Perform these checks.
Cooling Performance Test
Allow the AC to run for 15–20 minutes.
Verify:
✔ Cool airflow
✔ Consistent temperature
✔ Smooth operation
Water Drainage Test
Check whether condensate water flows properly through the drain pipe.
There should be no indoor leakage.
Noise Level Check
Listen for:
- Unusual vibration
- Rattling sounds
- Excessive compressor noise
A properly installed AC should operate smoothly.
Remote Function Test
Verify:
✔ Cooling mode
✔ Fan mode
✔ Dry mode
✔ Temperature control
✔ Swing function
Mistakes New Homeowners Frequently Make
Learning from others’ mistakes can save both time and money.
Choosing the Cheapest Installer
Low installation cost often results in poor workmanship.
Ignoring Pipe Quality
Inferior copper pipes can lead to refrigerant leakage.
Skipping Electrical Inspection
Unsafe wiring can damage expensive AC components.
Installing Without Future Service Access
Difficult-to-access units become costly to maintain.
Not Asking About Warranty
Always understand warranty terms for both equipment and installation.
Why Professional AC Installation Matters
A professionally installed air conditioner provides:
✔ Better cooling performance
✔ Lower electricity consumption
✔ Reduced repair risk
✔ Longer equipment lifespan
✔ Improved safety
✔ Better indoor comfort
Many performance complaints are actually installation-related rather than equipment-related.
Quick Installation Checklist for Homeowners
Before approving installation, confirm:
✅ Correct AC capacity selected
✅ Indoor unit positioned properly
✅ Outdoor unit ventilated adequately
✅ Copper pipes insulated
✅ Drain pipe installed correctly
✅ Dedicated power supply available
✅ Proper earthing completed
✅ Cooling performance tested
✅ Water drainage verified
✅ All functions tested successfully
Need Professional AC Installation Service?
Whether you’re moving into a new apartment, independent house, villa, or office space, professional installation is essential for long-term performance.
Our technicians provide:
✔ Split AC Installation
✔ Window AC Installation
✔ AC Relocation Support
✔ Copper Pipe Setup
✔ Electrical Safety Checks
✔ Installation Testing & Inspection
📞 Call Now: +91 85276 20895
🌐 Book Online:
https://sahooacservice.com/contact-us/
Final Thoughts
Buying a new AC is only half the job. Proper installation plays an equally important role in determining cooling performance, electricity consumption, and equipment lifespan.
By following this installation checklist, new homeowners can avoid common mistakes and ensure their air conditioner delivers reliable cooling for years to come.
A little planning before installation can save significant money, prevent future repairs, and provide a much more comfortable living environment.
Our Service Areas
AC Repair in Bhubaneswar
Patia | Rasulgarh | Khandagiri | Old Town | Chandrasekharpur | Jaydev Vihar | Nayapalli | Saheed Nagar | Acharya Vihar | Vani Vihar
AC Repair in Cuttack
CDA Sector 6, 7, 9, 10 | Badambadi | Buxi Bazaar | College Square | Link Road | Tulsipur | Choudwar
AC Repair in Kendrapara
Kendrapara Town | Baniamal | Patkura | Marshaghai | Aul | Derabish | Rajkanika | Mahakalapada | Rajnagar | Garadpur | Pattamundai | Nikirai | Batipada | Narasinghpur | Tinimuhani